Bathroom Trends 2019

As we near the middle of the fall and the end of the year it’s nice to look back and reflect on some of the trends that we have seen in Bathrooms in 2019. Here are what some of the top interior designers say that the trends have been in the past year.

  1. Big impression in small spacesPatrick Ediger explains by saying”Small spaces like powder rooms excel as a canvas for a singular, splashy statement. A high-contrast, large-scale wallpaper expands a small space and infuses it with an artful attitude.”
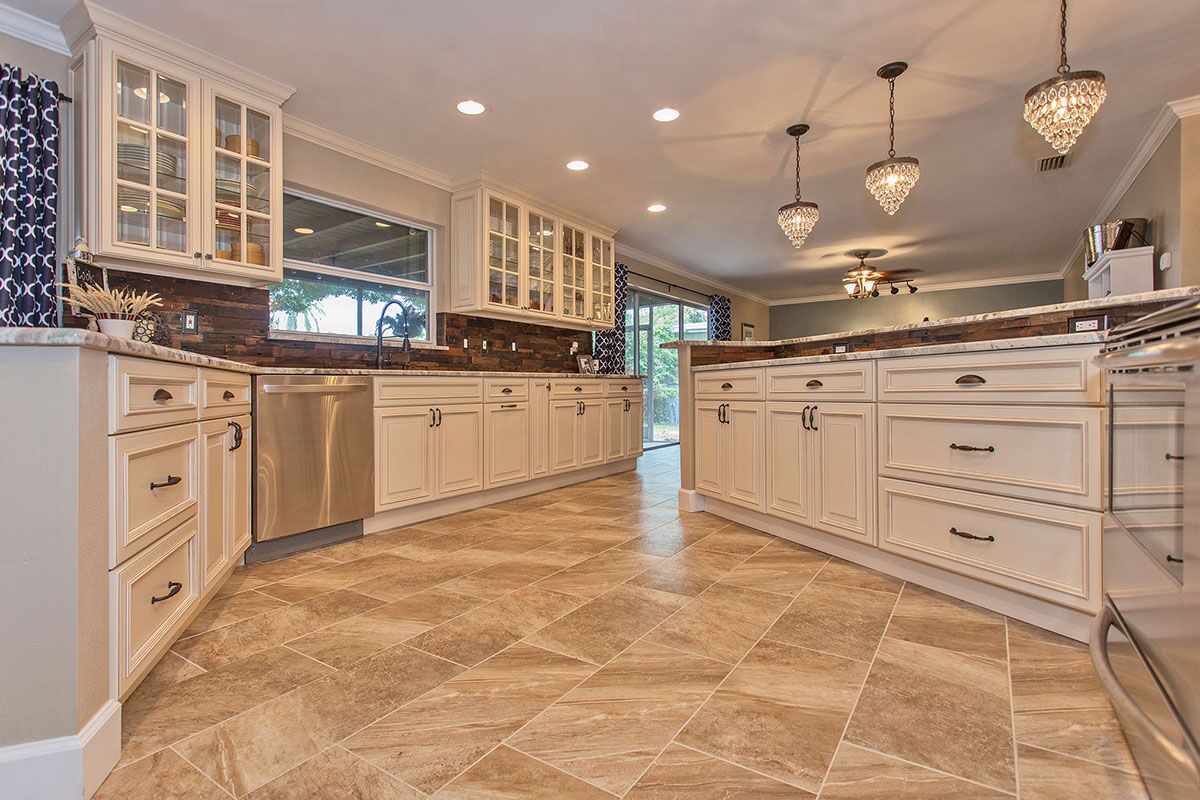
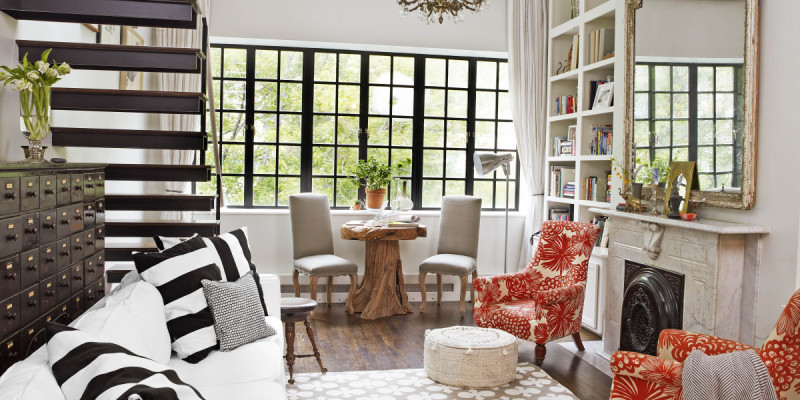
  2. A neutral pallet – “We love a classic bathroom and think it’s always on trend to have something that works for years to come. To keep it feeling modern we love using a monochromatic element throughout the whole space. For example, using all of one color or material (such as the color green or all marble tile) is a great way to achieve this, classic tile and motifs can be incorporated still but using all of one material creates a fun jewel box-like look to the space. You can still stay neutral and make it feel like something really special.” –Allison Petty
  3. A completely black bathroom – “The spa-inspired bathroom trend has officially returned–back to the spa, that is. These days it’s all about bold, dark, sultry bathroom designs that evoke an indulgent high-end experience.” — Kesha Franklin
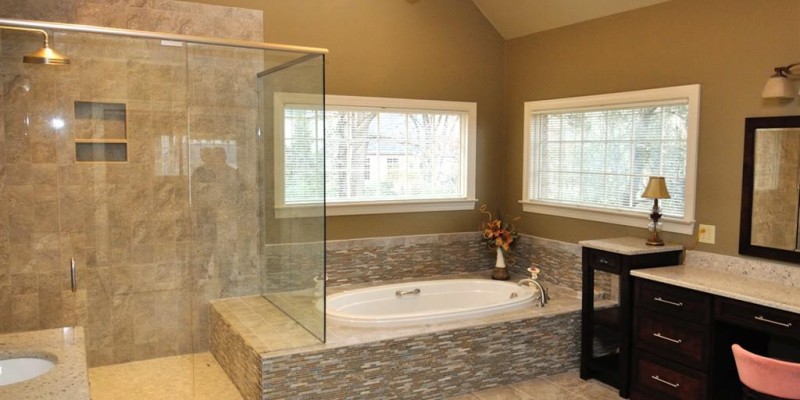
  4. Open concept designs – “Gone are the days where you hide behind a wall or door when getting ready for work or a big night out. It’s all about the open concept. The use of steel or privacy glass as a barrier is important, but ultimately, showering and getting ready in the open air is awesome. I see a lot of this happening in the residential interiors world.” — Becky Shea
  5. Statement Art – “The year 2019 is all about making an artistic statement; even in the bathroom. A sophisticated piece of fine art will provide your bathroom with a pretty focal point.” — Anne Hepfer 
  6. White and Grey Marble – “White and grey marble continue to be strong, popular materials into 2019 for bathrooms and kitchens alike. They are classic and timeless, can go from traditional to modern in terms of aesthetics, and are also great for resale. Man-made materials, such as quartz and porcelain tiles that look like natural stones, are also workhorses from a durability perspective and will continue to be popular in the new year.” — Ariel Okin
  7. Concrete – “We’ll see the use of concrete application in sink basins, countertops, floors and walls. It’s really exciting to see a brutalist material mixed with organic elements. Traditionally, concrete has been viewed as cold and non-welcoming, but I’m of the mindset that marrying this utilitarian medium with woods, steel, porcelain and resin is what you guys are going to see surface in 2019 across all design aesthetics.” — Becky Shea

How to Prepare for your NYC Apartment Renovation

1. Be a confident decision-maker

Everyone involved in the remodel, including you, want the remodel to move forward in a timely manner and on schedule. To make sure that this is the case it is imperative that all decisions are made quickly and efficiently. Your contractor will discuss with you possible situations that may come up on your project. These decisions on what the solution will be are not what usually causes delays. The smaller decisions like faucet selection,  paint, or trim choice are what people usually get stuck on. If these aren’t made in a timely manner, your faucet could be two weeks late because of shipping, and then your plumber will have to be rescheduled leading to a delay.

2. Compare prices and Set a Budget

This is hopefully an obvious one. It is important no matter what project you are doing to set a budget. When you are dividing up your budget per room, you will get the most return value on rooms like a master bathroom and or a kitchen if you decide to sell your place in the future. Also if you spend less money on lighting, vanities and closet systems, you will see more return on your investment.

You will want to get a rough idea of cost on all the different styles and looks you are considering implementing in your space. You don’t need an exact estimate yet, but having a rough estimate will allow you to better plan your budget. For an exact estimate, the remodeling agency will have to come in and assess the condition of your space before providing an exact estimate.

3. Create a Contingency fund

No matter how much you plan or prep for your remodel something always happens. Because of this, it is important to set aside 5% of your original budget just in case. Rarely does anyone ever set a realistic budget for a project. However, you should not consume your contingency fund to stretch your budget.

4. Visit a Kitchen and Bath Showroom

If you are remodeling your kitchen and bathroom it is really helpful to go see a local showroom. This will allow you to see materials in person, ask questions and get an idea on pricing. This will allow you to make some informed decisions before and during the remodel.

Melamine Cabinets? What you need to know

What is Melamine? It is a synthetic material used to produce cabinets in your kitchen and the rest of your home. Melamine has a compressed wood particle core, which is then covered with a resin and paper finish that can be manufactured to embody a variety of styles and colors. To better understand this material we will go through the pros and cons in the following list.

Pros

  • Durability – Because of the tough outer coating, Melamine is resistant to the usual issues presented in the kitchen, like excessive moisture, heat or stains. It is also really easy to clean.
  • Offer a large variety – As mentioned earlier, the synthetic material offers a huge range of finishes. It can come in any shade or color so it is easy to match your kitchen’s style.
  • A uniform finish – Unlike solid wood that can vary in grain patterns and color since melamine is manufactured in a controlled setting it offers a consistent finish.
  • Low Cost – Compared to solid wood cabinets, melamine is offered at a much lower price.

Cons

  • Cabinets can be heavy – This may not be your first concern but because of the weight, you may have to purchase heavy-duty brackets to install your cabinets. Without these, the cabinets may fall off the way which will cause expensive damages.
  • Melamine can chip – Even though the outside surface is durable it can be prone to chipping. This leaves the inner wood core exposed which is not attractive. It can also be expensive to have the cabinets refinished.
  • Can be harder to install – Because of how the material is constructed, the cabinets might splinter when using nails or screws. You should use a professional installation team, like GoldenIConstruction, to install your cabinets.
  • Melamine is prone to water damage – Any wooden material is likely to water damage, but if the wood particle core of the cabinets gets saturated with water, it can compromise their structural integrity. Water can be absorbed, in general, more easily in this material than solid wood.

Essential Tips to Choose the Perfect Bathroom Tile

Are you nervous or overwhelmed with choosing a bathroom tile? I can understand why, since there are so many sizes, shapes, colors and designs to choose from. Luckily, there are a few tips that can narrow down your options and make your final selection a lot easier.

1.Think about size

Tile comes in a huge range of sizes in any store. The range from less than one inch-by-one inch to several feet-by-several feet. You may think large tiles doesn’t make sense in a smaller bathroom but they create fewer grout lines making the floor feel like more of a continuous surface. If the tiles are smaller like  mosaic tiles, require more grou and then more cleaning especially if they are in wet places like the shower.

2. Balance Different Tile Types

Most bathrooms use multiple types of tile to create a cohesive design. When you are selecting tiles it is highly recommended that you don’t choose no more than three different tiles. If not, too many tile types, colors, and sizes will seem overwhelming. If you only use one tile type there will be very little variety meanng that it needs an accent tile with a different size, finish, or color.

3. Opt for a Neutral Floor and Ceiling

If you decide on using a neutral floor color it will allow you to experiment more with accent colors on the walls. Having a neutral floor allows you to push your eye upwards to the color on the wall. Also by painting the cieling a neutral color it has the same effect.

4. Consider your Whole Color Pallette

Developing a color pallete is one of the hardest parts. A good starting point is to start with a neutral pallete and then find one tile that you love and then work around that tile. This tile could be a simple tile you use almost everywhere, or a more extravagant tile that you use more like an accent. By having one tile this will make it easier to pick out complimentary tiles as needed.

5. Don’t Neglect Texture

Bathrooms require frequent cleaning and smooth tiles may be easy to clean but can also be a slipping hazard if they are under feet. Because of this, it is better to put a slightly textured tile under your feet and a smooth tile on the wall. A textured tile can also feel good on your feet.

6. Pick Tiles that Share Dimension

It is helpful to choose tiles that share similar dimensions so that grout lines line up and so it is easier to install. A way of doing this is by making sure the dimensions are a ll multiples of each other. For exampl, using a 12 inch-by-12 inch floor tile, with a four inch-by-four inch wall tile and a one inch-by-one inch border tile.

7. Don’t Forget about the Grout

Grout is not only important to make sure the surface is water resistante but it’s color is also essential to your design. If you are using a darker tile, white grout lines will contrast sharply, while a grout with a similar tone will be more subtle and, if desired, can almost blend in with the rest of the tile. There is also a trend right now of using a very simple, neutral tiles, like a while subway tile, and then using a brightly colored, eye-catching grout in a fun color for an unexpected, playful touch.

home renovation nyc

Home Decor Trends in 2019

Interior design trends are always changing and it is nice to see what is new in the interior design world. Now that we are over halfway done in the year lets reflect back and see what trends have started to emerge for 2019.

Mushroom Lamps

In 2018 Mushroom or Dome lamps started to gain popularity again. This only escalated in 2019. This trend has only started gaining traction since major retailers have already been jumping on the bandwagon and vintage models like the Oluce Attolo lamp becoming harder to find.

Maximalism

In the past few years, interior design has been dominated by minimalist Scandinavian design. However, recently we have been heading back to the return to more maximalist tendencies. This doesn’t mean everyone will revert to traditional or classic designs but rather they will start acquiring items that are long-lasting and from different time periods and styles.

Mid-Century Italian

Even though the MidCentury style has started to lose popularity, MidCentury Italian has been gaining popularity. Italian designers introduced curved furniture, delicate lines, and bold colors to the American side of the movement.

Primary Hues

In 2018 the colors were deep jewel hues and there has been a full spectrum of different colors in past years. However now, interior designers are loving bold primary colors. These colors include bold rusty reds, deep indigo blues, and bright mustard yellows.

Plinth Tables

In the past few years, Scandinavian furniture with skinny legs and minimalist style has dominated furniture. Now the opposite extreme is happening and weighty low-slung pieces that can balance out more delicate furniture pieces are becoming popular. Plinth tables are a great example of this. These also match with the hype around colored marble and other stone finishes.

Rice Paper Lanterns

Isamu Noguchi has dominated interior design trends in the past with his iconic pieces like his infamous coffee table for Hermann Miller or his series of Akari lanterns and lamps. Now his rice paper lantern designs have been really popular and have trickled down to mass retailers. IKEA has released a few models after making them popular in the ’90s.

Bouclé Accents

The popularity of this fabric has partly come from Goop’s collection for CB2 and higher-end retailers like HomeNature. Bouclé provides texture and high style.

10 Ways to Add a Splash of Color to Your Kitchen

Do you want to brighten up your kitchen? Adding some color is a great way to do this. Here are some great suggestions that you can implement in your own kitchen. 
  1. Accent doors– Having two different colors for your cabinets allows you to add a pop of color. You can make a few of your cabinets, like a row of uppers, have a colorful door and then it adds an intriguing pop of color to your kitchen.
  2. Wallpaper– Instead of using tile or paint for wall finishes in your kitchen, wallpaper is a great alternative. Using wallpaper(make sure its wet-space-safe) allows for a fun wall pattern or color in your kitchen. It can either be an accent or an all-over treatment.
  3. Wall Paint– You can also add an accent wall really easily with wall paint. This is great for a wall without cabinets or if you want a small bold color you can add it on a wall with cabinets and the cabinets will break the color up.
  4. Counter and bar stools– Feel free to use these as a way to get creative with adding colors. the stools around the counter are a great place to put a pop of color right in the center of your space. 
  5. Pendant lightening– Small glass pendant lights are now great sources of light because of the power of LED lights. They also are a great way to add a splash of color without being right in your face. 
  6. Open Shelving– Open shelves allow your kitchen to be part of your decor since it makes your kitchen supplies and tools viewable at all times. Also just having a few opens up your space to pops of colors because of the different hues from pots and supplies. 
  7. Color changing LEDs – These lights allow for you to add a variety of color accents to your kitchen without the permanence of paint. You get to change the colors whenever you want for different events and more. 
  8. Glass accents –  Translucent or frosted glass objects are really nice for kitchens because of the way that light reflects off the surface of them. These can be any different types of objects that you place around your kitchen.
  9. Warm Metallics – Warm metallics like Brass and Gold work really well in spaces that don’t have much color but they still add a sense of warmth and color to your space. They also work really well with stainless steel and other cooler metals. 
  10. Window Treatments – Window Treatments are pretty normal for more traditional spaces however they are great for modern spaces as well. Having an in window shade allows an opportunity to add a color or pattern to your kitchen. 

10 Design Tips for Small Bathrooms

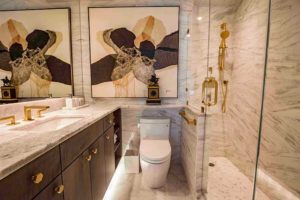
In apartments, especially in NYC, often times the bathroom is small. Homeowners often imagine that remodeling a small bathroom—one that is about 50 square feet or less—will be much quicker, much easier, and much less expensive than remodeling a large bathroom. Designing a small bathroom so that you have the optimal amount of space for every appliance while also maintaining storage and space for yourself provides a challenge and often times it’s only a little bit quicker, a little bit easier, and a little bit less expensive than a larger bathroom.

However, there are a few design tricks that if you remember while you are planning it will make the process easier.

1. Use a corner sink. In very small bathrooms, a sink configured to fit in a corner can be a great space-saving option. Even pedestal sinks can be difficult to fit in very small bathrooms.

2. Use a shower curtain or sliding shower door. Shower doors that pivot on hinges may not work for small bathrooms. Instead, use a shower curtain or glass shower door that slides on tracks.

3. Choose a vanity with rounded corners. In tight spaces, vanities with sharp corners can be hazardous. A vanity with rounded corners can prevent bruised hips.

4. Extend the counter over the toilet. A little extra counter space created when the vanity counter extends over the adjacent toilet can be surprisingly effective.

5. Use large-scale patterns. Large squares, wide stripes, and other large patterns can fool the eye and make spaces seem larger.

6. Mirror the wall. In tight spaces, having a mirror occupy the entire wall behind the vanity can help two people to use it at once.

7. Mount the towel bar on the door. When space is limited, mounting a towel bar on the shower door or the back of the entry door keeps towels at easy reach.

8. Choose a trough sink. When mounted on a wall, the low profile of a trough sink frees up floor space for storage.

9. Use a vanity with open shelves. Open shelves offer storage without swinging doors that can get in the way in a small bathroom.

10. Use a wall-mounted faucet. Mounting a faucet on the wall allows for a smaller vanity, which helps free up space in a small bathroom.
By following these design tips your small bathroom will not only have all the appliances that you need but will also maintain storage and space for yourself.

Create Space For Your Next Renovation

According to The New York Times article, “Making the Most of a Tiny Kitchen On A Tiny Budget,” Laura and Ian Greig found new ways to create more space during a home renovation. They did this by remodeling their small kitchen. 

Before the kitchen renovation, Laura and Ian did not have space to store a dishwasher. Many of their belongings would block the only window they had in their kitchen. Their kitchen was deprived of natural light. They were also burdened by the lack of space caused by their bulky cabinets and large air-conditioning soffits. They always thought that a kitchen renovation would not help their situation until they were made aware of a few renovation tips that would help any living space look bigger. 

Open The Window 

The first tip is letting in some light. The key to renovating Laura and Ian’s kitchen was to create space in front of their window. Along with rearranging their kitchen appliances, they painted other areas of the kitchen white so that the natural light looks like it’s bouncing off the surface. White and other light colors create space by creating a reflective quality that allows for light to bounce around and make a kitchen look bigger. 

Get Creative 

Laura and Ian were then advised to play with the layout. Playing with the layout of your kitchen is a key tool in creating space. By moving their sink flush against the wall with the window and new refrigerator, they were finally able to fit that dishwasher they’ve always dreamed of doing! For tips on playing around with your kitchen layout, contact us by clicking here

Think Bigger

Laura and Ian then took the final step of looking for other areas where space was being wasted. During the renovation, they realized that soffit around the refrigerator was much bigger than it had to be. Getting a smaller soffit, allowed for them to gain about six inches of overhead space. Laure and Ian made their hove not only look more spacious, also feel more comforting. For advice on your next hove renovation visit:
For more information on the article, click here.