
For a whole home renovation, there are some main steps that every renovation follows. Sometimes these some of these steps may not apply to your project if you are just updating the paint or the flooring.
The order of these steps may also vary based on the contractor. However, here at Golden I Construction, you will be guaranteed that these steps will be handled with the highest importance and expertise. We will sit down with you and discuss any of your concerns as well as use the best quality materials for completion.
- Demolition – Before anything new can be added, you need to get rid of the old. This may mean pulling up carpeting, tearing down wallpaper or tearing down walls. Demolition projects can range in time and some can be done in a day or two while others may take much longer. You will want to have a plan in place before the demolition begins for staying somewhere else during the process or you can move the location of the demolished room to somewhere else in the house.
- Rebuilding – Next step is to start rebuilding. If this involves walls then this is the step where wood framing is reassembled, windows are added, and doors are added to the framework. For room add-ons, the roof will be added and enclosed along with the gutters and exterior siding.
- Utilities – Now its time to add and reposition all the utilities. If you are installing new appliances or find you will be utilizing numerous electronic devices, the electrical panel may need updating as well. Gas and water utilities need to be considered especially if you are remodeling a bathroom and/or a kitchen. Water lines are not as easy to move so your remodeling project may have to be carefully planned around existing pipes. However, this is also a good opportunity to update water supply lines to new copper pipes which are not only more sturdy but allow water to run more quietly. For a remodel that is going to add gas appliances, running new pipes is a must but a larger meter may need to be installed too. During this step, the ductwork for central heating and air conditioning units will also be moved or extended to accommodate your new space.
- Walls – Now that all the interior stuff is properly in the walls it is time to start enclosing them. Insulation will be inserted or blown-in first. Then, drywall will be hung along with taping, mudding, and sanding. Once the walls are smooth they are ready for paint, wallpaper, or whatever finish you chose during your planning stages.
- Flooring – Depending on the contractor the flooring will either be installed after the walls have been painted and finished to avoid damage to floors or they could be installed before. This will depend on what you decided with your contractor during the planning stage.
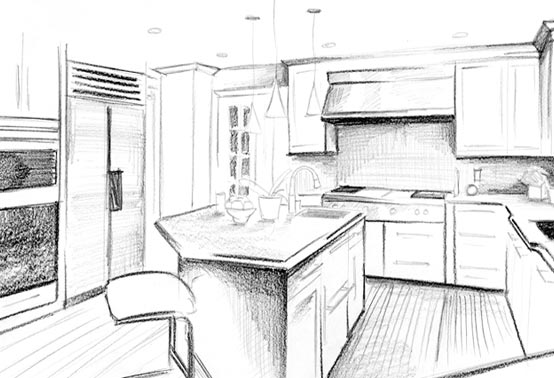
- Cabinets – Cabinets are a great way for your own personal design choices to start showing through. This step is when any new cabinets for the kitchen or bathroom will be installed. Everything from upper storage cabinets to vanities along with countertops that have been pre-cut with spaces to accommodate sinks and appliances.
- Appliances – Now it is time to make the new space functional. Any new appliances will be fitted and installed. Everything from the refrigerator to the stove, sinks, and tubs with their stylish faucets and fixtures, as well as the washer and dryer. Also if you chose to keep your previous appliances they will be introduced to their new locations during this step.
- Final Touches – Now it’s time for the last few touches before the clean up can begin. These touch-ups include any fixes to the paint or any wallpaper. This also includes customizable touches like backsplashes, and light fixtures, as well as, door and window trim, hooks, shelving, and hardware.


