What you need to know before renovating a NYC Co-Op

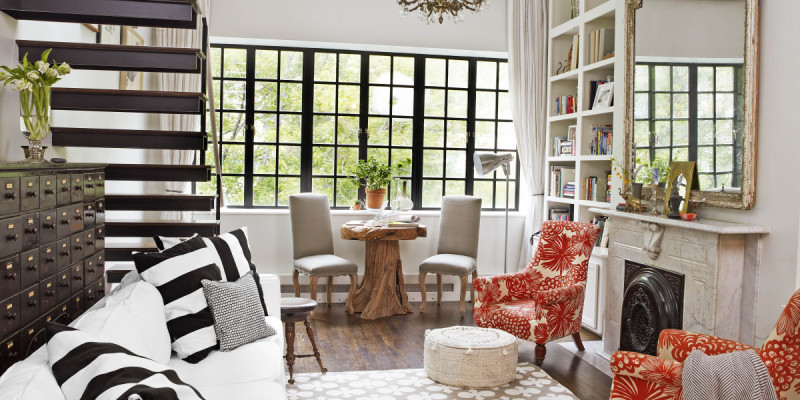
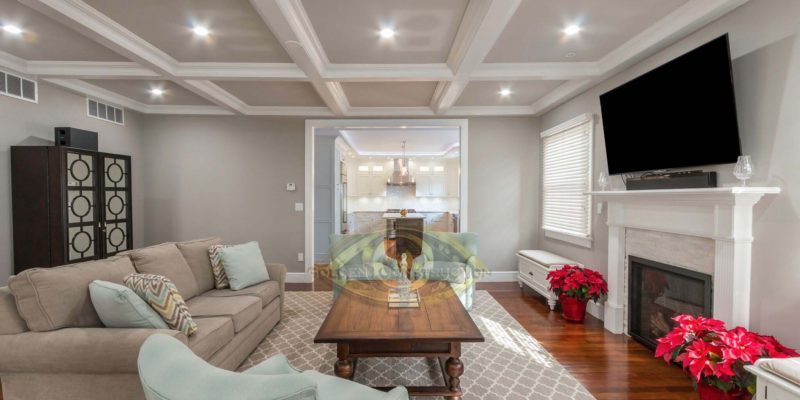
Renovations are sometimes a must, no matter if you have only lived there for a year or if it has been a long time. However, by living in a Co-op there is a list of rules and regulations that you need to follow and that includes renovations. Here are some questions you need to ask and the information you need to know before starting.

Can I even renovate my NYC Co-Op?

The answer to this very important question lies in your property lease. Reread your lease and that should tell you the guidelines you need to follow. Every property has slightly different rules but here are some general alteration guidelines that are pretty standard for co-op association renovation approval.

Approval needed

  • Removing or adding walls – If you want to do any change to the layout of your unit will require approval. Even if the removal of the wall between your kitchen and living space seems simple, speak with your board before starting.
  • Electrical or plumbing updates – If your project involves any wires or pipes it will need the board’s approval. The more pipes or wires that are hidden under the floor or ceiling the harder it will to get approved.
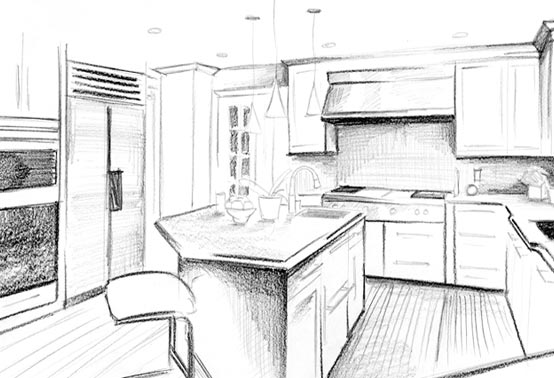
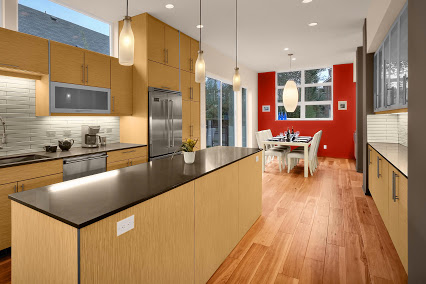
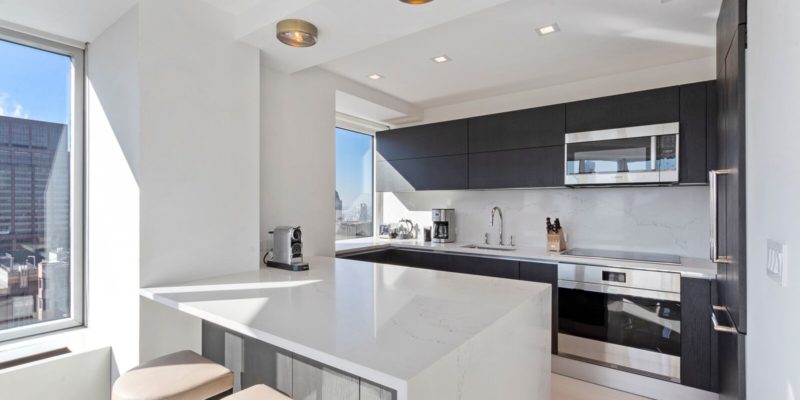
  • Any Full Updates –  If you are trying to completely update a kitchen or bathroom be prepared for a lengthy approval process. You will need to provide every detail and may have a deadline to get it done. This deadline might come with heavy fines for you if your contractor misses the deadline.

No Approval needed

  • Painting – This normally doesn’t need approval but definitely before painting you should check with your building manager just to be sure.
  • Small Cosmetic Changes – Switching out small details like faucets or showerheads normally doesn’t need approval. But if your building is LEED certified, make sure the new fixtures meet the standard requirements.
  • Hanging Wall Art – Most people assume this is a small change but make sure you ask before you drill holes in the wall. Some Co-ops don’t allow you to drill any holes in the wall.

How to get approval?

Be aware that even though there aren’t that many steps to get approved it still might take some time. The first step is to contact your co-op’s managing agent. You don’t have to go to the board yet since the managing agent will be able to provide you with the updated list of building’s alteration agreement. Then if your alterations require approval, write a formal letter to the board outlining your proposed work. In this letter, you should inquire if consent is required and if there are any other details you need to provide. Some buildings require contractors to be licensed and insured and may have guidelines about what time of year renovations can occur.  You also may even have some fees associated with your project.

As long as you are following your buildings alteration policy then it should be approved. If the board wants anymore information make sure that you provide it as quickly as possible.

Renovation Tips

Speak about renovations before buying your co-op – By making sure that you understand what is allowed with renovations going in to buying your co-op then it will save you many questions later. Also if you are buying an older co-op and know that you will need to renovate, think about adding your renovation plans with your application.

Seek approval before doing anything – This is incredibly important. Even if you make not think you need approval, still speak to the building manager. This will save you a lot of trouble if you do end up needing approval.

Find the right contractor- Always hire a contractor. If you know your board will need to approve your renovations, having a contractor can help you come up with plans and the proper details to share with them.

Have a plan and a backup plan – Having multiple plans in case something goes wrong is very important. You can never predict how a renovation will go. It could be a minor or major issue so make sure that you have multiple different plans. Have less expensive options if your budget gets out or control or have lodging set up elsewhere in case you miss the deadline and you’re without a bathroom or kitchen for several days.


Essential Tips to Choose the Perfect Bathroom Tile

Are you nervous or overwhelmed with choosing a bathroom tile? I can understand why, since there are so many sizes, shapes, colors and designs to choose from. Luckily, there are a few tips that can narrow down your options and make your final selection a lot easier.

1.Think about size

Tile comes in a huge range of sizes in any store. The range from less than one inch-by-one inch to several feet-by-several feet. You may think large tiles doesn’t make sense in a smaller bathroom but they create fewer grout lines making the floor feel like more of a continuous surface. If the tiles are smaller like  mosaic tiles, require more grou and then more cleaning especially if they are in wet places like the shower.

2. Balance Different Tile Types

Most bathrooms use multiple types of tile to create a cohesive design. When you are selecting tiles it is highly recommended that you don’t choose no more than three different tiles. If not, too many tile types, colors, and sizes will seem overwhelming. If you only use one tile type there will be very little variety meanng that it needs an accent tile with a different size, finish, or color.

3. Opt for a Neutral Floor and Ceiling

If you decide on using a neutral floor color it will allow you to experiment more with accent colors on the walls. Having a neutral floor allows you to push your eye upwards to the color on the wall. Also by painting the cieling a neutral color it has the same effect.

4. Consider your Whole Color Pallette

Developing a color pallete is one of the hardest parts. A good starting point is to start with a neutral pallete and then find one tile that you love and then work around that tile. This tile could be a simple tile you use almost everywhere, or a more extravagant tile that you use more like an accent. By having one tile this will make it easier to pick out complimentary tiles as needed.

5. Don’t Neglect Texture

Bathrooms require frequent cleaning and smooth tiles may be easy to clean but can also be a slipping hazard if they are under feet. Because of this, it is better to put a slightly textured tile under your feet and a smooth tile on the wall. A textured tile can also feel good on your feet.

6. Pick Tiles that Share Dimension

It is helpful to choose tiles that share similar dimensions so that grout lines line up and so it is easier to install. A way of doing this is by making sure the dimensions are a ll multiples of each other. For exampl, using a 12 inch-by-12 inch floor tile, with a four inch-by-four inch wall tile and a one inch-by-one inch border tile.

7. Don’t Forget about the Grout

Grout is not only important to make sure the surface is water resistante but it’s color is also essential to your design. If you are using a darker tile, white grout lines will contrast sharply, while a grout with a similar tone will be more subtle and, if desired, can almost blend in with the rest of the tile. There is also a trend right now of using a very simple, neutral tiles, like a while subway tile, and then using a brightly colored, eye-catching grout in a fun color for an unexpected, playful touch.

home renovation nyc

Home Decor Trends in 2019

Interior design trends are always changing and it is nice to see what is new in the interior design world. Now that we are over halfway done in the year lets reflect back and see what trends have started to emerge for 2019.

Mushroom Lamps

In 2018 Mushroom or Dome lamps started to gain popularity again. This only escalated in 2019. This trend has only started gaining traction since major retailers have already been jumping on the bandwagon and vintage models like the Oluce Attolo lamp becoming harder to find.

Maximalism

In the past few years, interior design has been dominated by minimalist Scandinavian design. However, recently we have been heading back to the return to more maximalist tendencies. This doesn’t mean everyone will revert to traditional or classic designs but rather they will start acquiring items that are long-lasting and from different time periods and styles.

Mid-Century Italian

Even though the MidCentury style has started to lose popularity, MidCentury Italian has been gaining popularity. Italian designers introduced curved furniture, delicate lines, and bold colors to the American side of the movement.

Primary Hues

In 2018 the colors were deep jewel hues and there has been a full spectrum of different colors in past years. However now, interior designers are loving bold primary colors. These colors include bold rusty reds, deep indigo blues, and bright mustard yellows.

Plinth Tables

In the past few years, Scandinavian furniture with skinny legs and minimalist style has dominated furniture. Now the opposite extreme is happening and weighty low-slung pieces that can balance out more delicate furniture pieces are becoming popular. Plinth tables are a great example of this. These also match with the hype around colored marble and other stone finishes.

Rice Paper Lanterns

Isamu Noguchi has dominated interior design trends in the past with his iconic pieces like his infamous coffee table for Hermann Miller or his series of Akari lanterns and lamps. Now his rice paper lantern designs have been really popular and have trickled down to mass retailers. IKEA has released a few models after making them popular in the ’90s.

Bouclé Accents

The popularity of this fabric has partly come from Goop’s collection for CB2 and higher-end retailers like HomeNature. Bouclé provides texture and high style.

Interior Renovations Step by Step

For a whole home renovation, there are some main steps that every renovation follows. Sometimes these some of these steps may not apply to your project if you are just updating the paint or the flooring.

The order of these steps may also vary based on the contractor. However, here at Golden I Construction, you will be guaranteed that these steps will be handled with the highest importance and expertise.  We will sit down with you and discuss any of your concerns as well as use the best quality materials for completion.

  1. Demolition – Before anything new can be added, you need to get rid of the old. This may mean pulling up carpeting, tearing down wallpaper or tearing down walls. Demolition projects can range in time and some can be done in a day or two while others may take much longer. You will want to have a plan in place before the demolition begins for staying somewhere else during the process or you can move the location of the demolished room to somewhere else in the house.
  2. Rebuilding – Next step is to start rebuilding. If this involves walls then this is the step where wood framing is reassembled,  windows are added, and doors are added to the framework. For room add-ons, the roof will be added and enclosed along with the gutters and exterior siding.
  3. Utilities – Now its time to add and reposition all the utilities. If you are installing new appliances or find you will be utilizing numerous electronic devices, the electrical panel may need updating as well. Gas and water utilities need to be considered especially if you are remodeling a bathroom and/or a kitchen. Water lines are not as easy to move so your remodeling project may have to be carefully planned around existing pipes. However, this is also a good opportunity to update water supply lines to new copper pipes which are not only more sturdy but allow water to run more quietly. For a remodel that is going to add gas appliances, running new pipes is a must but a larger meter may need to be installed too. During this step, the ductwork for central heating and air conditioning units will also be moved or extended to accommodate your new space.
  4. Walls – Now that all the interior stuff is properly in the walls it is time to start enclosing them. Insulation will be inserted or blown-in first. Then, drywall will be hung along with taping, mudding, and sanding. Once the walls are smooth they are ready for paint, wallpaper, or whatever finish you chose during your planning stages.
  5. Flooring – Depending on the contractor the flooring will either be installed after the walls have been painted and finished to avoid damage to floors or they could be installed before. This will depend on what you decided with your contractor during the planning stage.
  6. Cabinets – Cabinets are a great way for your own personal design choices to start showing through. This step is when any new cabinets for the kitchen or bathroom will be installed. Everything from upper storage cabinets to vanities along with countertops that have been pre-cut with spaces to accommodate sinks and appliances.
  7. Appliances – Now it is time to make the new space functional. Any new appliances will be fitted and installed. Everything from the refrigerator to the stove, sinks, and tubs with their stylish faucets and fixtures, as well as the washer and dryer. Also if you chose to keep your previous appliances they will be introduced to their new locations during this step.
  8. Final Touches – Now it’s time for the last few touches before the clean up can begin. These touch-ups include any fixes to the paint or any wallpaper. This also includes customizable touches like backsplashes, and light fixtures, as well as, door and window trim, hooks, shelving, and hardware.

How to make a plan for Home Remodel

There are many reasons to remodel your home. Does your home feel small or outdated? Maybe you want a new house but you can’t find anything you love? Or maybe you are trying to sell your house but want to update it first? It doesn’t matter the reason because there are many ways to update your house to fit the needs and lifestyle that you want.

A whole-home remodeling project can be a large and overwhelming feat. There are numerous decisions to make from how much of the home to remodel to what actual appliances are going in. Despite all of these decisions, the improvements you do make are an investment. Any home improvements you make should elevate the functionality of your house as well as increase your home value. The first step is making a plan.

Start with a Plan

Home renovation is in essence just a really really large project. Like with any large project the first step is always to make a plan since there are usually too many choices to make during the actual project. For a home renovation, it is important to make sure everything you want to improve is well-thought-out, researched, and discussed. Here are some factors that should be included in your overall plan.

Have a vision – It is a good idea for you to begin by looking through magazines or visiting home improvement stores for ideas and inspiration. However, no matter your dream or wish for your home you will need to make sure it’ll work in the layout of the house, add to its function or even fit into the budget. It’s a good idea to prioritize the top 5 -10 must-haves before making a definite plan.

Size – How much of your home are you remodeling? Are you adding on a new room or adding a whole new floor? If adding on is part of the plan, you’ll need to check if permits are needed or if there are neighborhood covenants to consider. Of course, all of these questions will depend on your budget.

Style and Design – Everyone has a personal style or design that they want in your home. However, you should make sure you pick a design that fits the test of time. Don’t pick a style that is so trendy that you will need to update again in 3 years or get so customized with your lighting or built-in cabinets that it’s impossible to resell later. There are many different styles to choose from like rustic, industrial, or modern and many more.

Budget –  The biggest decision to consider when making your plan is how much are you willing to spend? Once you set a budget you might discover your dreams are bigger than your pocketbook, but you can always scale back or put off part of the project until another time. Also when making your budget, many experts will tell you that you should plan for a contingency of 10 to 20 percent of your budget to cover any unforeseen discoveries that are made during the renovations.

Contractor – Hiring a contractor might be one of the best ideas you can make when doing a whole-house renovation. since they will be able to guide you through all aspects of the project. Contractors like Golden I Construction can help make the whole process simple and stress-free. Not only will we be able to tell you what will work or not work with your current home, but we’ll also provide suggestions for design, style, and the most current technologies in home improvement that you may not have considered.

Look into the Future  – It is important to consider how your remodels will fit your life and your family’s life in the future. As your family grows or kids move out it is important to consider how the customizable spaces you have will still be relevant and usable in the future. A tip is to make sure the spaces will last 20-30 years in the future.


The Pros and Cons of Staying vs Moving out during a Renovation

Renovating a space can many times stir up old toxins like asbestos and lead and bring new toxins into your home, which is a huge pro for wanting to move out while renovating. However, moving out can add on to your budget and is an inconvenience. Moving out isn’t always necessary for every project. There are many things that you can do with your contractor to lessen the impact of a renovation. Some include installing drywall that converts toxins and setting up humidifiers. Here are some of the questions to ask your self so you can make an informed decision.

What are you Renovating? 

This is an incredibly important question when deciding if you are going to stay or go. If you are doing a complete gut renovation it will end up taking over your home and contractors suggest moving out. This will speed up the timeline and keep you away from any toxins. 
However, if you are not doing a complete overhaul, staying for most of the renovations is a good medium. Contractors, however, do encourage you to move out during the dusty demolition phase for at least a week so that the dust can settle and they can do a thorough cleaning. 

Can you stretch your budget? 

You should try to know if you are going to be relocating during the renovation as soon as possible. This will allow you to include your other living plans, whether that is a hotel or short term rental charges, in your budget. You could also plan a vacation during the renovation to get you out of the way as well. However, this could backfire if you are planning on keeping constant tabs on the renovation. 

Do you have children or a sensitive adult? 

Lead exposure has a harsher impact on children since their brains are still developing. If your home was built before 1978 it is possible that lead paint was used on the walls. When the paint is disturbed that’s when the toxins are released. Your contractor will do a test for lead paint in older homes. When children are involved staying or going carries extra weight since the particles could get in the air or on their hands when they crawl around.  
Toxins can have a range of effects on an adult. If you are immune-compromised from cancer or some other disorder that will make it harder for your body to expel toxins. Asthma sufferers also have a harder time since they are more sensitive to air quality. 

Can you live without a bathroom or kitchen?

If you are renovating a kitchen you need to be prepared to adapt to not having one. This will mean having those extra charges of takeout constantly. Or you can set up a makeshift kitchen in the bathroom with a hot plate, microwave and running water. 
A bathroom renovation can be trickier especially if it is your only bathroom. Sometimes you will be able to use the bathroom before the contractor arrives but there will be a point where the bathroom will be unusable. 

What is the layout of your home? 

This is an important question to think about since you want to separate where you are living from where the work is happening. If there is only one point of entry to your home the contractors will be tracking dust through your space. 
Contractors can do certain things to prevent the spread of dust and toxins through your home. The renovation will be sectioned off with thick plastic and tape. The negative air pressure also stops contaminated air from leaving the renovation zone whenever a worker exits or enters.

NYC Apartment Renovation Mistakes to Avoid

When renovating your apartment in NYC it is important to make sure you understand your space and what will work for you as well as look great. Sometimes the trends or styles that you see or want to try aren’t the best ideas for the space that you already have. 

It’s important to talk to all the professionals involved in the project to make sure that your ideas truly fit your space. For example, running your ideas by your contractor gives the contractor the opportunity to point out any potential problems they may see. 
Here are five of the common mistakes to avoid in New York City Apartment remodels. 

1. Getting rid of the tub

This is mainly only an issue if there is only one bathtub in the apartment. If you are getting rid of the only bathtub to make a big walk-in shower you might want to rethink it.

Not having a bathtub doesn’t appeal to families. Instead, you can get rid of the shower curtain and add glass doors above the bathtub. You get the feel of a walk in shower while still maintaining a bathtub.

2. Installing modern flooring in a prewar apartment

The main problem with this is that when you try to put the apartment back on the market, it no longer has the pre-war feel people will be expecting. If your oak or maple floors are in bad condition consider replacing them with the same or similar wood.

Do not use modern alternatives like pre-finished, engineered, or other materials like stone or tile because this may depreciate the overall value of the apartment. 

3. Eliminating closets

Storage in NYC apartments is hard enough to find. You may want to rethink getting rid of a closet to expand one of your rooms especially if you don’t have a lot of closets. Often when people are looking for an apartment they look for closets and storage space. 

4. Ungainly tile

Just because you like a tile that you see in a bathroom model in Home Depot or Lowes doesn’t mean that it will fit in your apartment. Especially if that bathroom was meant for suburbia.

It is important that you take tile samples home and lay them out on your floor so that you get a feel of the size and proportion. It is important to select a tile of the right size because a too large tile can be costly and a messy error to fix. 

5. Turning a two bedroom into a one bedroom 

This is one of the most common renovation mistakes in NYC apartments. Taking down a wall to enlarge a room but losing a bedroom in the process may sound like a great idea. However, by doing this you now classify your apartment as a one bedroom and that may make it difficult to resell on the market. Since it is classified as a one bedroom it may lead to a more limited group of potential buyers and a lower asking price. You can always put the wall back up when you are preparing to sell the place but it is important to keep in mind the consequences. 

Keep these tips in mind when. you are planning a renovation and always make sure you talk to professionals. Here at Golden I Construction, that will not be an issue! We will always be willing to go over every step of the process with you. 
Remember, it is your apartment and we want to make it the best it can be! For more tips and information about apartment renovations, visit https://www.goldeniconstruction.com/our-services/apartment-renovation-nyc/

10 Ways to Add a Splash of Color to Your Kitchen

Do you want to brighten up your kitchen? Adding some color is a great way to do this. Here are some great suggestions that you can implement in your own kitchen. 
  1. Accent doors– Having two different colors for your cabinets allows you to add a pop of color. You can make a few of your cabinets, like a row of uppers, have a colorful door and then it adds an intriguing pop of color to your kitchen.
  2. Wallpaper– Instead of using tile or paint for wall finishes in your kitchen, wallpaper is a great alternative. Using wallpaper(make sure its wet-space-safe) allows for a fun wall pattern or color in your kitchen. It can either be an accent or an all-over treatment.
  3. Wall Paint– You can also add an accent wall really easily with wall paint. This is great for a wall without cabinets or if you want a small bold color you can add it on a wall with cabinets and the cabinets will break the color up.
  4. Counter and bar stools– Feel free to use these as a way to get creative with adding colors. the stools around the counter are a great place to put a pop of color right in the center of your space. 
  5. Pendant lightening– Small glass pendant lights are now great sources of light because of the power of LED lights. They also are a great way to add a splash of color without being right in your face. 
  6. Open Shelving– Open shelves allow your kitchen to be part of your decor since it makes your kitchen supplies and tools viewable at all times. Also just having a few opens up your space to pops of colors because of the different hues from pots and supplies. 
  7. Color changing LEDs – These lights allow for you to add a variety of color accents to your kitchen without the permanence of paint. You get to change the colors whenever you want for different events and more. 
  8. Glass accents –  Translucent or frosted glass objects are really nice for kitchens because of the way that light reflects off the surface of them. These can be any different types of objects that you place around your kitchen.
  9. Warm Metallics – Warm metallics like Brass and Gold work really well in spaces that don’t have much color but they still add a sense of warmth and color to your space. They also work really well with stainless steel and other cooler metals. 
  10. Window Treatments – Window Treatments are pretty normal for more traditional spaces however they are great for modern spaces as well. Having an in window shade allows an opportunity to add a color or pattern to your kitchen. 

The Best Kitchen Countertop Materials

Shopping for countertops can feel very overwhelming since there are hundreds of colors, patterns, and textures. However, there are really only a few basic categories of materials for countertops that you should know. Let’s break down the pros and cons as well as the important information to know for each type of countertop.

First off, when choosing a counter material you need to think about your needs and habits in the kitchen.  For example, if you cook a lot and do prep on the countertop, you don’t want to use a soft porous material. You also have to consider your overall kitchen design. You want to make sure the counters fit with the appliances, the backsplash as well as the cabinets in your kitchen.

Natural Stone

Granite: This is a very common and popular material for a countertop since it comes in a variety of colors. The colors offered range from vibrant reds and blues, midnight black, as wells as white.

Pros – no (or low) visible seams, durable surface, heat-resistant

Cons – must be sealed to resist heat as well as can be expensive

Marble: This is a softer stone and more high end then granite. It is also comes in much fewer colors. However it is great surface for baking but since it is softer might show knife scars or be discolored by citric acid.   

Pros – durable, striking natural patterns

Cons – high-maintenance, needs repeated sealing, expensive

Soapstone

pros – won’t need sealing

cons – soft and may show knife marks

Slate

pros – won’t need sealing

cons – brittle especially at corners


Engineered Stone

Quartz : This is stone is what most engineered stone is made out of. It comes it lots of different colors and is a hard material so it doesn’t need any sealing

pros – no sealing, durable, low maitenance

cons – expensive 

Concrete


Precast: These concrete slabs are extremely smooth and flat. These countertops can also have a variety of colors as well as have glass or other materials embedded in to give it an artistic feel. 

pros – won’t scratch, durable, heat resistant

cons – must be professionally installed, expensive, needs sealing

Solid surfaces

Acrylic or Polyester: These counters show no seems since the pieces get fused together. This is great for long stretches of countertop. You can also get sinks to match

pros – low maitenance, lots of colors, repairable, non-porous

cons – not heat resistant, shows knife marks and scratches

Plastic Laminates

pros – very affordable, durable and hardwearing, ready-to-install,

cons – not heat resistant,  can chip or scratch

Tile

Ceramic or Stone:  Lots of color options and many different styles. Has to be applied over laminate or fresh plywood topped with cement backerboard. 

pros – lots of colors,  affordable, lots of choices,  ceramic is non porous

cons – regular grout cleaning is necessary

Wood

Edge-Grain: These counters have long, thick strips of wood that are glued together with the edge grain facing up

End-Grain (aka Butcher Block): These counters have relatively short, square sticks of wood that are joined together with the tough end grain facing up

Wide-Plank: These counters are made by edge-gluing wide boards together. These counters are the most susceptible to warping and cracking.

pros to wood – warm, ideal work surface, heat resistant

cons to wood– medium maintenance, will show knife marks

10 Design Tips for Small Bathrooms

In apartments, especially in NYC, often times the bathroom is small. Homeowners often imagine that remodeling a small bathroom—one that is about 50 square feet or less—will be much quicker, much easier, and much less expensive than remodeling a large bathroom. Designing a small bathroom so that you have the optimal amount of space for every appliance while also maintaining storage and space for yourself provides a challenge and often times it’s only a little bit quicker, a little bit easier, and a little bit less expensive than a larger bathroom.

However, there are a few design tricks that if you remember while you are planning it will make the process easier.

1. Use a corner sink. In very small bathrooms, a sink configured to fit in a corner can be a great space-saving option. Even pedestal sinks can be difficult to fit in very small bathrooms.

2. Use a shower curtain or sliding shower door. Shower doors that pivot on hinges may not work for small bathrooms. Instead, use a shower curtain or glass shower door that slides on tracks.

3. Choose a vanity with rounded corners. In tight spaces, vanities with sharp corners can be hazardous. A vanity with rounded corners can prevent bruised hips.

4. Extend the counter over the toilet. A little extra counter space created when the vanity counter extends over the adjacent toilet can be surprisingly effective.

5. Use large-scale patterns. Large squares, wide stripes, and other large patterns can fool the eye and make spaces seem larger.

6. Mirror the wall. In tight spaces, having a mirror occupy the entire wall behind the vanity can help two people to use it at once.

7. Mount the towel bar on the door. When space is limited, mounting a towel bar on the shower door or the back of the entry door keeps towels at easy reach.

8. Choose a trough sink. When mounted on a wall, the low profile of a trough sink frees up floor space for storage.

9. Use a vanity with open shelves. Open shelves offer storage without swinging doors that can get in the way in a small bathroom.

10. Use a wall-mounted faucet. Mounting a faucet on the wall allows for a smaller vanity, which helps free up space in a small bathroom.
By following these design tips your small bathroom will not only have all the appliances that you need but will also maintain storage and space for yourself.