Bathroom Remodel Checklist

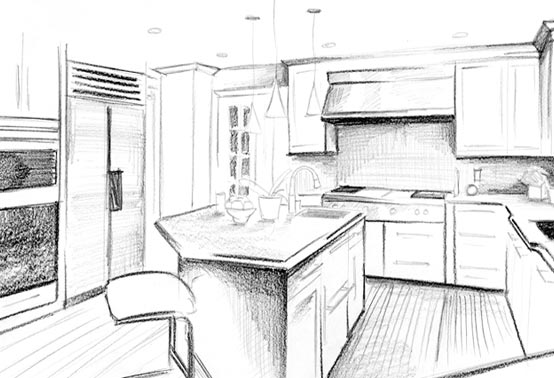
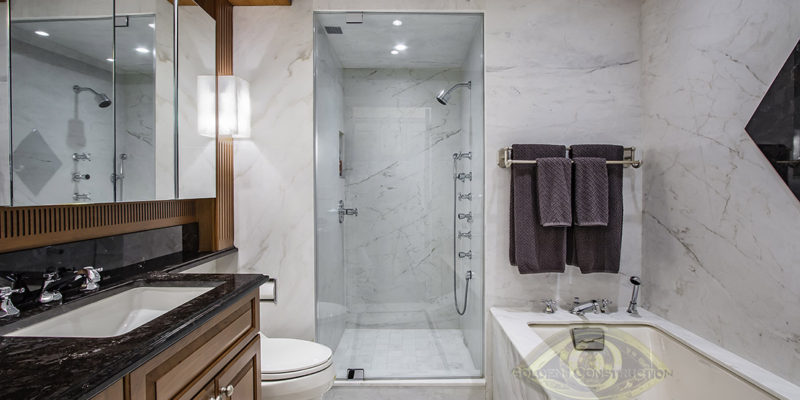
Remodeling a bathroom is a great way to refresh your space and increase your home value. Your remodel could be simple like applying a new coat of paint, refreshing the appliances or it could be more complex by doing a complete renovation and starting from scratch.  No matter what updates you are planning on doing it is helpful to plan ahead. Here is a checklist of important questions to ask yourself.

  • Make a list of priorities for the remodel as well as expectations 
    • What is your big-picture goal?
    • When does the job need to be finished?
  • Set a Budget
    • What are you planning on doing? New Shower? More Square footage? A fresh coat of paint?
    • Go through everything you are planning on doing to the bathroom and account for the price. Don’t forget the details, like the knobs on the new cabinets and the light switch covers.
  • Choose a color palette or design style
    • You should try to stay consistent with the color and materials you choose. You should also try to keep the design consistent with the rest of your house.
  • Source your materials and permits
    • Talk to manufacturers. Look into alternative eco-friendly, low-VOC or moisture-resistant materials.
    • Consider upgrades such as a bathroom fan, electric heater or radiant-heated floors.
    • Try to purchase as much as possible before you begin.
  • Plan all the logistics
    • Find out if you will need plumbing for the toilet or shower or if you can use existing pipes
    • Make sure you can get all the materials in time by checking the shipping periods
    • Find a contractor like GoldenIConstruction
    • Will the remodel have enough demolition that you’ll need to seal off other rooms from dust or noise?
  • Anticipate Obstacles
    • Will the subfloor need to be replaced?
    • Will the new fixtures and appliances like a new tub fit through the door?
    • Can the existing wiring be used?
    • Will the inspection officer be available during the remodeling process?
  • Create a timeline
    • Make a list of steps throughout the process that follow a set timeline
  • Get creative 
    • Be creative when designing the space
    • Find light fixtures at thrift stores

Interior Renovations Step by Step

For a whole home renovation, there are some main steps that every renovation follows. Sometimes these some of these steps may not apply to your project if you are just updating the paint or the flooring.

The order of these steps may also vary based on the contractor. However, here at Golden I Construction, you will be guaranteed that these steps will be handled with the highest importance and expertise.  We will sit down with you and discuss any of your concerns as well as use the best quality materials for completion.

  1. Demolition – Before anything new can be added, you need to get rid of the old. This may mean pulling up carpeting, tearing down wallpaper or tearing down walls. Demolition projects can range in time and some can be done in a day or two while others may take much longer. You will want to have a plan in place before the demolition begins for staying somewhere else during the process or you can move the location of the demolished room to somewhere else in the house.
  2. Rebuilding – Next step is to start rebuilding. If this involves walls then this is the step where wood framing is reassembled,  windows are added, and doors are added to the framework. For room add-ons, the roof will be added and enclosed along with the gutters and exterior siding.
  3. Utilities – Now its time to add and reposition all the utilities. If you are installing new appliances or find you will be utilizing numerous electronic devices, the electrical panel may need updating as well. Gas and water utilities need to be considered especially if you are remodeling a bathroom and/or a kitchen. Water lines are not as easy to move so your remodeling project may have to be carefully planned around existing pipes. However, this is also a good opportunity to update water supply lines to new copper pipes which are not only more sturdy but allow water to run more quietly. For a remodel that is going to add gas appliances, running new pipes is a must but a larger meter may need to be installed too. During this step, the ductwork for central heating and air conditioning units will also be moved or extended to accommodate your new space.
  4. Walls – Now that all the interior stuff is properly in the walls it is time to start enclosing them. Insulation will be inserted or blown-in first. Then, drywall will be hung along with taping, mudding, and sanding. Once the walls are smooth they are ready for paint, wallpaper, or whatever finish you chose during your planning stages.
  5. Flooring – Depending on the contractor the flooring will either be installed after the walls have been painted and finished to avoid damage to floors or they could be installed before. This will depend on what you decided with your contractor during the planning stage.
  6. Cabinets – Cabinets are a great way for your own personal design choices to start showing through. This step is when any new cabinets for the kitchen or bathroom will be installed. Everything from upper storage cabinets to vanities along with countertops that have been pre-cut with spaces to accommodate sinks and appliances.
  7. Appliances – Now it is time to make the new space functional. Any new appliances will be fitted and installed. Everything from the refrigerator to the stove, sinks, and tubs with their stylish faucets and fixtures, as well as the washer and dryer. Also if you chose to keep your previous appliances they will be introduced to their new locations during this step.
  8. Final Touches – Now it’s time for the last few touches before the clean up can begin. These touch-ups include any fixes to the paint or any wallpaper. This also includes customizable touches like backsplashes, and light fixtures, as well as, door and window trim, hooks, shelving, and hardware.

NYC Apartment Renovation Mistakes to Avoid

When renovating your apartment in NYC it is important to make sure you understand your space and what will work for you as well as look great. Sometimes the trends or styles that you see or want to try aren’t the best ideas for the space that you already have. 

It’s important to talk to all the professionals involved in the project to make sure that your ideas truly fit your space. For example, running your ideas by your contractor gives the contractor the opportunity to point out any potential problems they may see. 
Here are five of the common mistakes to avoid in New York City Apartment remodels. 

1. Getting rid of the tub

This is mainly only an issue if there is only one bathtub in the apartment. If you are getting rid of the only bathtub to make a big walk-in shower you might want to rethink it.

Not having a bathtub doesn’t appeal to families. Instead, you can get rid of the shower curtain and add glass doors above the bathtub. You get the feel of a walk in shower while still maintaining a bathtub.

2. Installing modern flooring in a prewar apartment

The main problem with this is that when you try to put the apartment back on the market, it no longer has the pre-war feel people will be expecting. If your oak or maple floors are in bad condition consider replacing them with the same or similar wood.

Do not use modern alternatives like pre-finished, engineered, or other materials like stone or tile because this may depreciate the overall value of the apartment. 

3. Eliminating closets

Storage in NYC apartments is hard enough to find. You may want to rethink getting rid of a closet to expand one of your rooms especially if you don’t have a lot of closets. Often when people are looking for an apartment they look for closets and storage space. 

4. Ungainly tile

Just because you like a tile that you see in a bathroom model in Home Depot or Lowes doesn’t mean that it will fit in your apartment. Especially if that bathroom was meant for suburbia.

It is important that you take tile samples home and lay them out on your floor so that you get a feel of the size and proportion. It is important to select a tile of the right size because a too large tile can be costly and a messy error to fix. 

5. Turning a two bedroom into a one bedroom 

This is one of the most common renovation mistakes in NYC apartments. Taking down a wall to enlarge a room but losing a bedroom in the process may sound like a great idea. However, by doing this you now classify your apartment as a one bedroom and that may make it difficult to resell on the market. Since it is classified as a one bedroom it may lead to a more limited group of potential buyers and a lower asking price. You can always put the wall back up when you are preparing to sell the place but it is important to keep in mind the consequences. 

Keep these tips in mind when. you are planning a renovation and always make sure you talk to professionals. Here at Golden I Construction, that will not be an issue! We will always be willing to go over every step of the process with you. 
Remember, it is your apartment and we want to make it the best it can be! For more tips and information about apartment renovations, visit https://www.goldeniconstruction.com/our-services/apartment-renovation-nyc/

5 Pros and Cons on Open Floor Plans in Your NYC Apartment

Here we will talk about the pros and cons of open floor plans. First of all, what is an open floor plan? An open floor plan is when you knock down walls, creating one BIG” room instead of having 3 small rooms (kitchen, dinning room and living room). 

PROs:

Increase natural lights. Why do you want to pay more for electricity when you have natural sunlight?  Having large windows can maximizing this effect.

 Increase sociability among family members and guests. Think about the time when you are alone in the living room of a friend’s house while your friend is cooking. Aren’t you bored? Isn’t it awkward being alone? What if you want to catch up with your long time no see friend? Open kitchen allows people to converse more easily without having to shout through walls.


Increase visibility in the house.  

Keeping an eye on your children and pets. It is time to make lunch/ dinner but you can’t bring your kid to the kitchen. Wouldn’t you want to keep an eye on your kid? What if he/she is just learning how to talk, wouldn’t you want to here their first words? What if your toddler just learn to walk, would you want to respond to any falls. Well, you definitely will not hear them through walls.

Dinner is ready but your soup is not. You are so hungry but you need to keep an eye on the soup. Should I wait for the soup to be done or should I eat first? Why do you have to choose? Having an open kitchen allows you to see what goes on in other rooms

Flexibility in customizing your apartment. When the walls are down, there are more space to work with.

If you are a indecisive person, like me, you are going to have trouble styling each room. Why not have one design that represent you?

Creating an illusion. The populations in NYC exceeds 8 millions and there are limited space in housing. Having an open floor plan creates an illusion that a small apartment is looks bigger. 


CONs:

Keeping the pets away. When there is food, you pet is always going to want it. Having an open kitchen may be difficult to keep your pets away. In addition, it also makes it easier for your pet to get to the kitchen.

It can get noisy. What did you say? I cannot hear you! Without the walls to keep the noise out, you hear everything in that one big room. Your toddler is crying, your dog is howling and your spouse is watching television, can you concentrate on making make dinner?

Less Privacy. Because it is one big room, you see everything. 

Less Creativity  With the less walls you have, there can only be a limited pictures and artworks you can present.

Bad Reflection If your open room is messy, it makes the whole apartment looks messy.